How to Draw Forget Me, Not Flowers
Learn to draw a beautiful Forget-me-not flower with easy step-by-step drawing instructions and video tutorials. By following the simple steps, you, too, can easily draw a beautiful Forget-me-not flower. Do you want to show me praise? Flowers to someone you love? You can learn to draw forget-me-not flowers so that you will never be forgotten! Several different types of forget-me-not or forget-me-not flowers are native to Europe, Asia, and the Americas, and garden varieties have been cultivated for centuries.
The name arrives from an ancient Greek word denoting “mouse ear.” Another name is scorpion fodder. Forget-me-nots include been used as signs for groups as diverse as the Freemasons and the welfare unit of the Nazi Party. Today, the flowers honor fallen soldiers, especially those of World War I, or raise awareness for Alzheimer’s disease. Are you interested in floral design?
You can practice your skills by building a complex bouquet. Add rosebuds in different colors: pink, white, lavender, and blue. Or radiate away from cut flowers in turn of a potted plant. If you liked this tutorial, check out the following drawing guides: Flower Crown, Cartoon Flowers, and Dogwood Flowers.
Also read: rose flower drawing
Step-by-Step Education for Drawing Forget Me Not Flowers.
Step 1
Begin by drawing the twig or stem. Draw a pair of long curved lines that are parallel but diverge at the top. Connect them at the bottom. Then, draw a series of lines in a “V” shape to create the smaller twigs.
Step 2
Draw a second stem. Use a pair of long curved lines connected by a short line at the bottom and meet at a point at the top. Use a “V” line and a short line to create another smaller twig. Begin drawing the large flowers, erasing them as necessary. For each petal, use two curved lines that meet at a smooth point. Allow the petals to overlap
Step 3
Complete the first flower and draw the second large one, erasing as necessary. For each petal, use two curved lines that meet at a smooth point. Allow the petals to overlap, forming a flower in the shape of a five-pointed star. Then, draw a center on one of the flowers. First, shade a small oval. Then, use a wavy line to possess a five-pointed figure.
Step 4
Shade an oval on the remaining flower and circle a wavy shape. Then draw a third, smaller flower, erasing as necessary. Again, use curved lines that meet at a smooth point for each petal. Shade a small oval in the center and circle a wavy shape.
Step 5
Draw a fourth flower and start drawing a fifth. Use curved lines that meet at a smooth point for each petal. Shade a small oval in the center and circle a wavy shape.
Step 6
Complete the fifth flower with softly pointed petals, a dark center, and a wavy shape around it. Then start drawing the petals of the next flower.
Step 7
Meet the petals and the seat of the previous flower. Then start drawing the gently pointed petals of the next flower.
Step 8
Complete the last flower with a petal and the camp. Then draw leaves. For each leaf, extend two curved lines and allow them to meet at one point. Draw a curved line to form the midrib of the leaf.
Step 9
Draw more leaves. Use a couple of curved lines for each, allowing them to meet at a sharp point. Then, draw a curved line to form the midrib of the leaf.
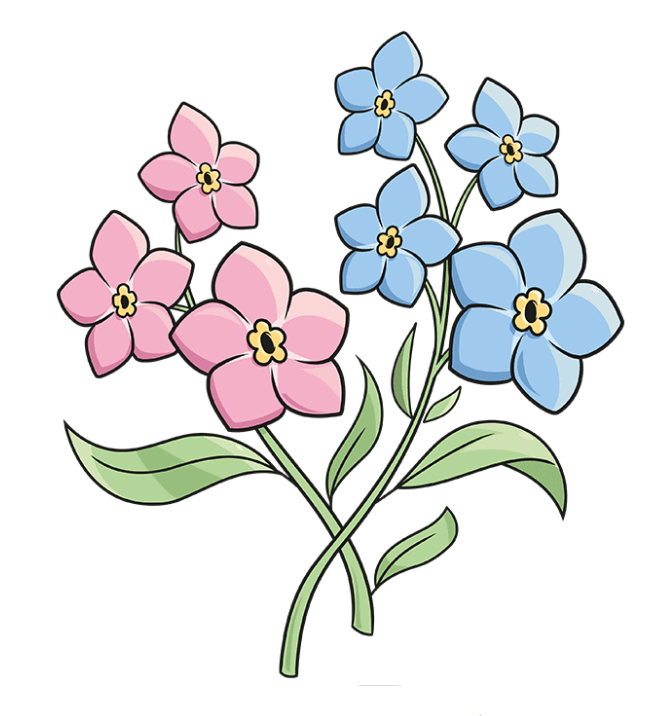
Color your caricature, forget me, not flowers. We’ve dyed ours in soft pink and down. In nature, these flowers are usually pink with yellow or orange centers, turning blue over time. Some are also white. Periodically all three colors can happen on the same stem.