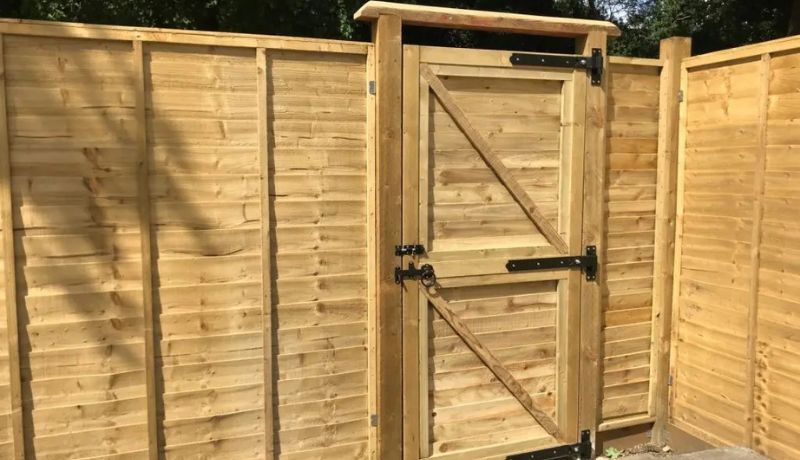
Are you looking to build a wooden gate? If yes, this blog post is very useful for you, so you just need to follow all the steps properly. As you know, if a person wants to enter and exit a fenced-in area, gates are necessary. You should construct a gate catch, and suffolk latch to your exact specifications instead of buying one. This specification will enhance a fence’s appearance and functionality. You need to use high-quality wood to ensure that no one will be able to see through the gate’s slats.
Know the Easy Steps to Build a Wooden Gate
-
Cut the Tongue and Groove Boards to Size
First of all you need to make a pencil mark on a groove board at 72 inches using your measuring tape. Now, use your mitre saw, trim the boards to 72 inches in length. So, before going ahead, take out the old gate and its hardware. These procedures presume that the mounting fence post is sturdy and properly deep-secured.
Moreover, accurate measurement of the aperture is necessary to guarantee that your gate will fit properly. The distance between the two mounting points or fence posts should be measured. In order to find the width of the gate, deduct 3/4 inches from the overall width.
-
Measure to Cut the Horizontal Braces
Measure three 42-inch segments on two of the 1×6 cedar planks with the measuring tape (not the tongue and groove boards). Cut these sections into three boards that are each 42 inches long. The majority of gate hardware kits come with 1/4-inch-thick steel brackets.
If required, adjust this step to account for the thickness of your brackets. Mark two two-by-four boards to be 6 1/2 inches shorter than the final gate height using the measuring tape, square, and pencil.
Cut a single board from each two-by-four that is 10 feet long using a circular or mitre saw. From the remaining two-by-four lumber, cut two pieces to the same width as the gate. Each fence picket should be reduced by 1 1/2 inches from the final gate height.
-
Set the Boards Out
In this step, lay out the three 1×6 boards on a level, flat areas like a driveway or garage floor. Keep in mind, two of the boards should be placed five feet apart and parallel to one another. Moreover, the third board needs to be exactly in the middle of the other two, parallel to them.
Then, tongue and groove boards should then be placed on top of the three boards. After fitting them together, gently tap the tongue of one board into the groove of the adjacent board. In this way, the 1×6 boards below could be rearranged as a result of this approach. If this happens, leave the tongue and groove boards but reposition the lower boards to their original locations.
-
Attach Groove Boards
You need to use the 7/8-inch external screws, fasten the tongue. Then, groove boards to the 1×6 horizontal bracing boards underneath. This is to prevent splitting, drill the screw holes in advance. Make sure, you should pay special attention to those lower boards to make sure they don’t shift.
Four brackets, latch hardware, and two types of screws are all included in the gate hardware set. Now, start by attaching each bracket to the top and bottom of the board. This is for using the longer screws from the kit using the drill and screwdriver bit.
Even more, one long frame board, and the two brackets with the hinges connected. The hinges ought to all be directed away from the board. After this, lay the two boards level and parallel so that the brackets face one another on a flat surface. In a straight line, parallel to the long boards and brackets.
In this case, you need to place the short pieces of two by four lumber. To make a corner, you need to insert the longer kit screws through the bracket and into the short two-by-four. In the other case, short board and both sides of the other board.
-
Measure the Diagonal Brace and Cut it
After completing the above step, flip the gate over with caution. Furthermore, cross the horizontal braces with the remaining 1×6 cedar board in a diagonal fashion. It is important that the diagonal board should be temporarily secured in place using screws.
While keeping it aligned to the lines of the horizontal braces. So, place your straight edge ruler over this diagonal brace. According to the diagonal bracing, make six pencil marks that are perpendicular to the top and bottom of each horizontal brace.
The temporary screws must be removed and cut the diagonal bracing at those six points using your mitre saw. The two ends and the centre of the three cut pieces will eventually be thrown away. This will leave just two cut pieces for the diagonal brace.
-
Install the Gate
Install the gate on your fence and support it with discarded cedar planks. This is to leave a clearance of roughly 1/2 inch at the bottom. On the side of the gate where the hinges are, leave a space of about 1/4 inch. At this point, having a helper hold the gate open is useful.
Screw the hinges to the gate frame and into the top, middle, and bottom of the gate. You can use the cordless drill and the screws that came with the hinges. In addition, make sure the gate swings open and shut properly. To level, tighten, or loosen the gate, if necessary, adjust the hinges.
-
Install the Latches
Now you need to install the screw to slide latches into the top and bottom of the gate. This was done by using the cordless drill and the screws that came with the latches. Attach the receiving pieces of the gates using screws. The flip latch should then be mounted in the middle of the gate in a similar manner.
-
Finish for the Gate
There are a number of finishes available but also depends on how you want to finish your gate. It is suggested to match the finish of your current fence or go for a striking difference. The wood will be shielded from the sun and other harsh elements for years. Especially, if you treat the wood with a top layer of oil, stain, paint, or varnish.
You need to apply an exterior grade paint or stain to your new wooden gate as directed by the manufacturer. In this way, wooden privacy fences provide your backyard with a number of advantages simultaneously. These benefits are such as seclusion, security, beauty, and functionality.
Final Thoughts
To summarise, wooden fences need to be maintained with gate catch, and suffolk latch in order to keep working properly. The moving portions of the fence are a good example of this. Moreover, wooden privacy gates frequently sag or reach the end of their usefulness. However, you don’t always need a new fence if your gate is worn. So, it is important to read this blog in order to construct and install a replacement wooden gate.
Thanks for Reading!
Forward this article to your friends who want to know the easy steps to build a wooden gate.
Read more: Latest Discuss